Cycling a saltwater tank with live rock is the process of establishing beneficial bacteria colonies that convert toxic ammonia into nitrite and then into less harmful nitrate. This nitrogen cycle takes 4-8 weeks to complete and is the essential first step before adding any fish or invertebrates to a marine aquarium.
Live rock — porous coral skeletons and ocean rock colonized by bacteria, plankton, and microorganisms — provides the biological surface area where these bacteria thrive. A fish only with live rock (FOWLR) setup is the most common approach for saltwater beginners because the live rock handles much of the biological filtration naturally.
Do Not Add Fish Until Cycling Is Complete
Adding fish to an uncycled tank exposes them to toxic ammonia and nitrite levels. Wait until both ammonia and nitrite read 0 ppm before introducing any marine life. The full cycling process takes 4-8 weeks.
Understanding the Nitrogen Cycle
The nitrogen cycle is a three-stage biological process that keeps aquarium water safe for marine life. Each stage requires a specific type of bacteria to convert waste into progressively less toxic compounds.
Stage 1: Ammonia production. Fish waste, uneaten food, and die-off from live rock release ammonia (NH3) into the water. Ammonia is highly toxic to marine life — concentrations above 0.25 ppm can cause gill damage and death in saltwater fish.
Stage 2: Ammonia to nitrite. Nitrosomonas bacteria colonize the live rock surfaces and convert ammonia into nitrite (NO2-). Nitrite is also toxic to marine life — levels above 0.1 ppm stress saltwater fish and can be lethal with prolonged exposure.
Stage 3: Nitrite to nitrate. Nitrobacter bacteria consume nitrite and convert it into nitrate (NO3-). Nitrate is far less toxic but should be kept below 20 ppm in fish-only tanks and below 5 ppm in reef tanks. Regular water changes remove accumulated nitrate.
Denitrifying bacteria living deep within porous live rock and sand perform a fourth conversion, turning nitrate into harmless nitrogen gas that escapes through the water surface. This is why live rock with high porosity is so valuable — it provides both aerobic surfaces for nitrifying bacteria and anaerobic zones for denitrifying bacteria.
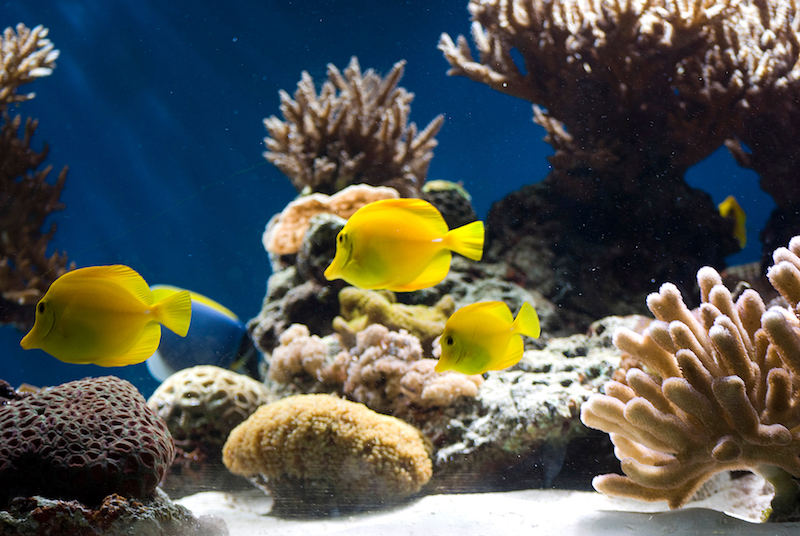
The nitrogen cycle converts toxic ammonia through nitrite into less harmful nitrate
Skip the Fish-In Cycling Method
Older guides recommend adding a hardy fish to produce ammonia and start the cycle. This practice is unnecessary and harmful. Die-off from live rock provides all the ammonia needed to establish the nitrogen cycle without subjecting fish to toxic water conditions.
What You Need Before Starting
Gather all equipment before beginning the cycling process. Do not purchase any fish or invertebrates at this stage — they will be added after cycling is complete.
Essential Equipment
- Aquarium tank — 30 gallons or larger recommended for stability
- Live rock — 1-2 pounds per gallon of tank volume (choose quality options from our live rock guide)
- Protein skimmer — removes organic waste before it breaks down
- Water heater — maintains stable temperature at 76-82°F (24-28°C)
- Filtration system — provides mechanical and chemical filtration
- Aquarium lighting — keep off during cycling to limit algae growth
- Marine salt mix or pre-mixed saltwater
- Water test kit — must test ammonia, nitrite, nitrate, and pH
- Live sand (optional but recommended) — adds additional bacterial surface area
- Large dedicated bucket — for water changes only, never used with soap
Choosing Live Rock
The quality of live rock directly affects cycling speed and long-term tank health. Cured live rock arrives with established bacteria colonies and cycles faster. Uncured live rock requires additional die-off time but is often less expensive. See our complete live rock guide for detailed product comparisons and selection advice.
Cured vs. Uncured Live Rock
| Feature | Cured Live Rock | Uncured Live Rock |
|---|---|---|
| Cycling time | Faster (4-6 weeks) | Slower (6-8+ weeks) |
| Cost | Higher | Lower |
| Die-off | Usually minimal | Significant |
| Ammonia spike | Mild | Strong initial spike |
| Hitchhiker risk | Lower | Higher |
| Best for | Beginners, faster setup | Budget builds |
Either type works for cycling. Cured live rock is more convenient and forgiving, while uncured live rock costs less but requires more patience. You can also mix both — using cured rock as the base and supplementing with uncured rock for additional volume.
When purchasing live rock, inspect it carefully before adding it to your tank. Hitchhikers — unwanted organisms living inside the rock — are common and can include mantis shrimp, Aiptasia anemones, predatory crabs, and bristleworms. Many of these are harmful to fish and other livestock, and once established in a tank they are extremely difficult to remove.
8 Steps to Cycle a Saltwater Tank with Live Rock
Step 1: Rinse and Set Up Equipment
Rinse the aquarium tank and all equipment in plain water. Never use soap or detergent — chemical residue is toxic to marine life. If possible, do a test fill with plain water to check for leaks before proceeding — it’s much easier to deal with a leak now than after substrate and live rock are in place.
Place the filter, protein skimmer, heater, and other equipment in position but do not turn anything on yet.
Step 2: Add Substrate
If you’re mixing your own saltwater, start preparing it now in a separate container with a heater and powerhead. By the time your substrate is in place, the saltwater will be mixed, at temperature, and ready to add.
If using a dry substrate like aragonite sand or crushed coral, rinse it thoroughly under running water to remove dust and spread a 1-2 inch layer across the tank bottom. If using live sand, add it directly without rinsing — rinsing kills the beneficial bacteria that make it valuable. You can also layer both, with dry substrate on the bottom and live sand on top.
Adding at least some live sand is worth the cost — the beneficial bacteria it introduces help speed up the cycling process. To save money, use a base layer of dry sand and top it with a thinner layer of live sand. The bacteria from the live sand will colonize the dry sand over time.
Step 3: Add Live Rock
Before placing rock, gently add a small amount of mixed saltwater to the tank — just enough to cover the sand bed. This keeps the live sand from drying out while you take your time arranging the rockwork.
If you’re using dry rock, rinse it first and take your time arranging it into a design you like — creating caves, overhangs, and open spaces for water circulation. Since there’s no rush with dry rock, you can experiment with different layouts and secure pieces together with reef-safe epoxy if needed.
If using live rock, minimize the time it spends out of water to keep the beneficial organisms alive. You can add more saltwater to the tank to keep the rock wet while you work on your design, or fill the tank completely first and arrange the live rock underwater. Arrange the rock to create caves and overhangs that provide shelter for future fish, while ensuring good water circulation around all surfaces. Avoid stacking rock directly against the glass.
Natural die-off from microorganisms in the live rock produces ammonia, which starts the nitrogen cycle. Cured live rock produces less die-off and may cycle faster. Uncured live rock produces more die-off, extending the cycle but providing a stronger initial ammonia source.
Step 4: Fill with Saltwater
Add pre-mixed saltwater, or mix marine salt according to package instructions. Turn on the heater, pumps, and filter. A full lighting schedule isn’t needed during cycling — keeping the lights off or running them for only an hour or two a day can help reduce algae growth while beneficial bacteria are getting established. That said, expect the “ugly phase” — a period of diatom blooms, film algae, and cloudy water that every new tank goes through. It’s unavoidable and a normal part of the process, but limiting lights can make it less intense.
Target these water parameters:
- Temperature: 76-82°F (24-28°C)
- Specific gravity: 1.023-1.025
- pH: 8.1-8.4
Now it’s time to wait. The cycling process is slow by nature, and patience is the most important thing you can bring to it. There’s no way to rush the bacteria — they grow on their own schedule.
Step 5: Inspect for Hitchhikers
Now is the time to let your new tank stabilize. After 24 hours, check that salinity and temperature are where they should be and make any adjustments. During this time and over the following days, monitor the tank closely for hitchhikers. The early cycling period is the best time to trap and remove unwanted organisms:
- Remove: Mantis shrimp, large bristleworms, Aiptasia anemones, predatory crabs
- Keep: Tiny starfish, small feather duster worms, copepods, amphipods — these indicate healthy live rock and add beneficial biodiversity
Keep the heater, pump, filter, and protein skimmer running continuously from this point forward.
Step 6: First Water Test (Day 3)
Test the water for ammonia on day three. A measurable ammonia reading — even a small one — confirms the nitrogen cycle has begun.
If ammonia reads zero after three days, add a small piece of raw, unpreserved shrimp from the grocery store to introduce ammonia through decomposition. Remove the shrimp after ammonia becomes detectable. In rare cases, fully cured live rock may skip a noticeable ammonia spike entirely. You should expect to see ammonia rise, but if your first detectable reading shows nitrite instead, that still indicates the cycle is progressing.
Step 7: Monitor Cycle Progress (Weeks 1-4)
Test the water every few days and track how ammonia, nitrite, and nitrate levels change over time. The cycle progresses through three phases:
Phase 1 — Ammonia rises (Week 1-2). Ammonia levels climb as die-off from the live rock breaks down. The water may appear cloudy and develop an unpleasant odor — both are normal signs that the process is working. Continue running all equipment and do not perform water changes during this phase.
Phase 2 — Nitrite appears, ammonia falls (Week 2-3). Nitrite begins showing up in your tests, which means Nitrosomonas bacteria are established and converting ammonia. You’ll see ammonia levels start to drop while nitrite climbs. Algae blooms of various colors may come and go during this period — this is expected.
Phase 3 — Nitrate appears, nitrite falls (Week 3-4). Ammonia should be near zero and nitrite starts dropping as Nitrobacter bacteria mature and convert it into nitrate. Once you see rising nitrate with declining nitrite, you’re in the home stretch.
Step 8: Final Test and Water Change (Week 4-8)
Continue testing weekly until both ammonia and nitrite consistently read 0 ppm and nitrate is present. The water should be clear without any foul odor.
Once ammonia and nitrite are at zero, the cycle is complete — your bacteria are established. If nitrate is above 20 ppm, perform a water change to bring it down. A 20-25% water change is a good starting point, but you may need to do a couple over several days if nitrate is very high. Get nitrate below 20 ppm before adding any livestock.
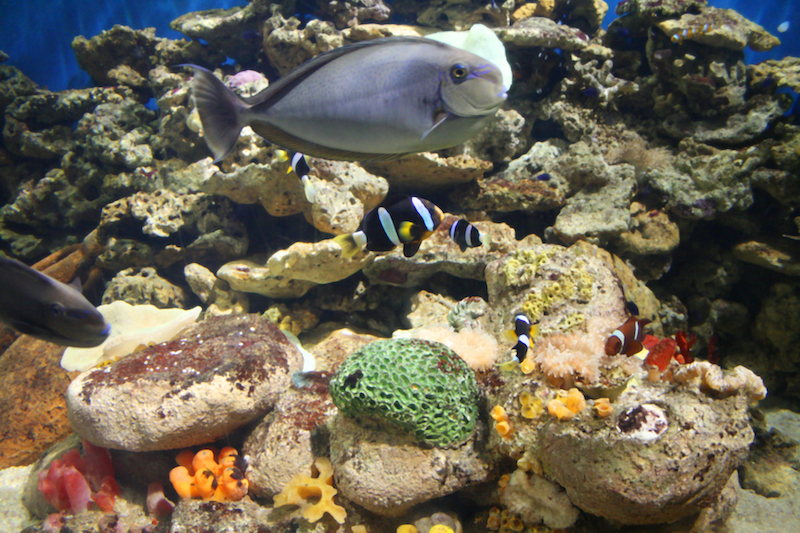
Fully cycled live rock provides essential habitat for beneficial bacteria and future tank inhabitants
Introducing Livestock After Cycling
This is one of the most critical stages of setting up a saltwater tank. Your newly cycled aquarium has just enough bacteria to handle the minimal bio-load that got the cycle started — it is nowhere near ready for a full stock of fish. Adding too many animals too quickly overwhelms the bacteria, causes an ammonia spike, and can crash the entire cycle. That means dead livestock and wasted money, plus starting the cycling process over again.
As with everything in the saltwater hobby, patience is the key. Moving slowly is always the best approach.
Week 1 after cycling: Start with a small cleanup crew — hermit crabs, snails, or a cleaner shrimp. These hardy invertebrates tolerate minor water parameter fluctuations better than fish. Add just one or two, then wait a full week while monitoring ammonia and nitrite to confirm the bacteria can handle the additional load.
Week 2-3 after cycling: If water parameters remain stable, begin adding hardy saltwater fish — one or two at a time. Clownfish, damselfish, and chromis are common starter species. That said, research any fish before buying it and make sure it’s one you actually want to keep long-term. Saltwater fish can live for many years — don’t add a fish just because it’s hardy if it’s not part of your plan.
Week 4+ after cycling: Continue adding fish gradually, waiting at least one week between additions. The bacterial colony grows to match the bio-load over time, but only if you give it the chance to catch up after each new addition.
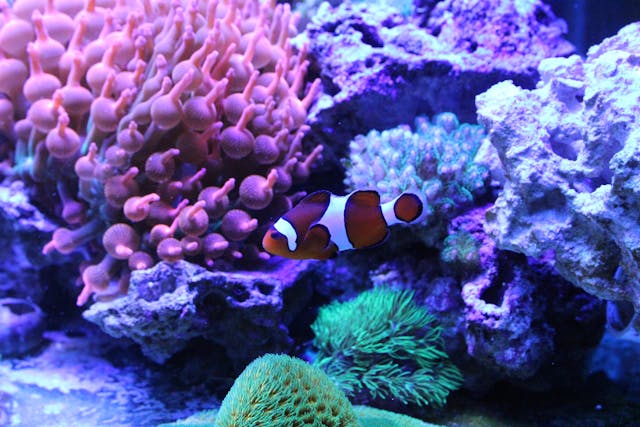
A mature saltwater tank — the reward for patience during cycling and slow stocking
Resist the Urge to Stock Quickly
It’s tempting to add all the fish you’ve been planning for, but this is where many new saltwater hobbyists run into trouble. Every animal you add produces waste that the bacteria need to process. If you add too many at once, ammonia spikes, fish get stressed or die, and you’re back to square one. Go slow — your patience now pays off with a healthy, stable tank for years to come.
The Ugly Phase: What to Expect
Every new saltwater tank goes through an ugly phase, and it can be alarming if you’re not expecting it. During the first few weeks and months, you’ll likely see a progression of unsightly algae blooms and bacterial films. This is completely normal and does not indicate a problem with your tank.
Diatoms are usually the first to appear — a brown, dusty film that coats the glass, sand, and rock. They feed on silicates in new sand and rock and are almost unavoidable. A cleanup crew of snails and hermit crabs will graze on them, and they typically fade on their own within a few weeks.
Green hair algae and film algae often follow as nutrients fluctuate in the new system. You may also see cyanobacteria — a slimy red or dark green film that’s actually a bacteria, not a true algae. These come and go as the tank’s biology matures.
The key is to not panic and not overreact. Avoid the temptation to tear everything apart, dose chemicals, or make drastic changes. As the bacterial populations mature and stabilize over the coming weeks and months, these nuisance blooms naturally fade. Consistent maintenance, not overfeeding, and patience are the best remedies. Every established, beautiful saltwater tank you’ve ever seen went through this same phase.
Troubleshooting: When Cycling Stalls
A stalled cycle occurs when ammonia or nitrite levels plateau for more than two weeks without progressing. Common causes and solutions:
Temperature is outside optimal range. Keep the temperature between 77-82°F. Slightly elevated temperatures can help speed up bacterial growth, but don’t go much higher than you intend to run the tank long-term. Temperatures that are too low slow the process significantly. Verify the heater is maintaining a stable temperature in this range.
pH has dropped too low. The nitrogen cycle produces acid, which can lower pH over time. Nitrifying bacteria slow down as pH drops. Aim to keep pH above 7.5, and ideally between 8.0-8.5. Test pH and adjust higher if needed using a marine buffer.
Insufficient water circulation. Nitrifying bacteria require oxygen. Poor water flow creates dead spots where bacteria cannot thrive. Ensure the powerhead and filter provide adequate circulation around all live rock surfaces.
Chlorine or chemicals in the water. Chlorine and chloramine in tap water kill beneficial bacteria. Always use dechlorinated water or RO/DI water for saltwater mixing.
Not enough ammonia source. If using fully cured live rock that produces minimal die-off, the cycle may lack sufficient ammonia to sustain bacterial growth. Add a small piece of raw shrimp to boost ammonia levels.
If a stalled cycle persists after addressing these factors, adding a small piece of cured live rock from an established, healthy tank can reintroduce active bacterial colonies and restart the process.
Ongoing Maintenance Schedule
Once the cycle is established and the tank is healthy, the best thing you can do is build good habits early. Establishing a regular maintenance schedule and sticking to it is far less work than dealing with problems after they’ve gotten out of hand. A few minutes of routine care each day prevents the kind of issues that take hours — or expensive interventions — to fix.
Daily
Daily Tasks
- Feed fish once or twice daily — remove uneaten food within 5 minutes to prevent ammonia spikes
- Observe all fish and invertebrates for changes in behavior, color, or appetite
- Top off evaporated water with freshwater (not saltwater) to maintain stable salinity
- Check water temperature (76-82°F) and specific gravity (1.023-1.025)
Weekly
Weekly Tasks
- Test water for ammonia, nitrite, nitrate, and phosphates — any detectable ammonia or nitrite indicates a problem
- Clean inside aquarium glass to remove algae buildup
- Rinse mechanical pre-filter media
- Wipe salt creep from tank edges, equipment, and surrounding surfaces
- Rinse the protein skimmer collection cup — more often if it fills up quickly
Every Other Week
Bi-Weekly Tasks
- Perform a 10-15% water change using properly mixed saltwater at matching temperature and salinity
- Replace filter media on alternate weeks from water changes — changing both simultaneously removes too many beneficial bacteria
- Clean the light fixture and hood
Monthly
Monthly Tasks
- Inspect and clean all tubing, connections, and equipment
- Check protein skimmer performance and clean as needed
- Test calcium, alkalinity, and magnesium levels if starting to keep corals — if you dive deeper into corals, you'll want to test these much more frequently, often several times a week depending on your situation
Every 6-12 Months
Semi-Annual Tasks
- If using T5 or other bulb-based lighting, check and replace bulbs according to manufacturer recommendations — as bulbs age, their spectrum shifts and intensity drops, which can affect coral growth and algae management. Most modern saltwater tanks use LED lighting, which doesn't require bulb replacement
Water Change Best Practice
Smaller, more frequent water changes (10-15% weekly) are better for tank stability than larger, less frequent changes (25% monthly). Never change more than 25% of the water at once — large water changes disrupt the nitrogen cycle and stress livestock.
How long does it take to cycle a saltwater tank with live rock?
Cycling a saltwater tank with live rock typically takes 4-8 weeks. The process involves establishing beneficial bacteria colonies that convert toxic ammonia to nitrite, then to less harmful nitrate. Using cured live rock can speed up this process, while uncured rock may extend it due to additional die-off.
Can I add fish during the cycling process?
No, you should never add fish during the cycling process. The ammonia and nitrite levels during cycling are toxic and can kill fish. Wait until both ammonia and nitrite levels are virtually undetectable before introducing any marine life, starting with hardy invertebrates like shrimp or hermit crabs.
What is live rock and why is it important for cycling?
Live rock refers to coral skeletons, rocks, and other structures harvested from the ocean that host beneficial bacteria, plankton, and microorganisms. These organisms are essential for establishing the nitrogen cycle in your aquarium, converting toxic ammonia from fish waste into less harmful compounds.
How do I know when my saltwater tank is fully cycled?
Your tank is fully cycled when ammonia levels are at 0 ppm, nitrite levels are at 0 ppm, and nitrate is present but below 20 ppm. You should also see no more die-off from the live rock, and the water should be clear without any foul odor.
What should I do if I find mantis shrimp or other hitchhikers in my live rock?
Inspect live rock thoroughly before adding it to your tank, checking every hole and crevice. If you discover mantis shrimp or bristleworms after adding the rock, the early cycling period is the best time to trap and remove them. Small beneficial creatures like tiny starfish and worms can stay as they indicate a healthy tank.
What do I do if my saltwater tank cycle stalls?
A stalled cycle — where ammonia or nitrite levels plateau without dropping — usually results from insufficient bacteria, temperature issues, or pH problems. Verify temperature is 76-82°F and pH is 8.1-8.4. Ensure adequate water circulation. Adding a small piece of cured live rock from an established tank can reintroduce bacteria and restart the process.
Related Topics
Found this helpful?
Share this guide with your fellow aquarium enthusiasts!

Written by
Jonathan Jenkins
I've been keeping fish for over 15 years — everything from planted freshwater tanks to saltwater reefs. I currently have a 30 gallon overstocked guppy breeding tank, 40 gallon planted self-cleaning aquarium, 200 gallon reef tank, and 55 gallon frag tank. I joined Fish Tank World to continue learning while sharing what I've learned along the way.